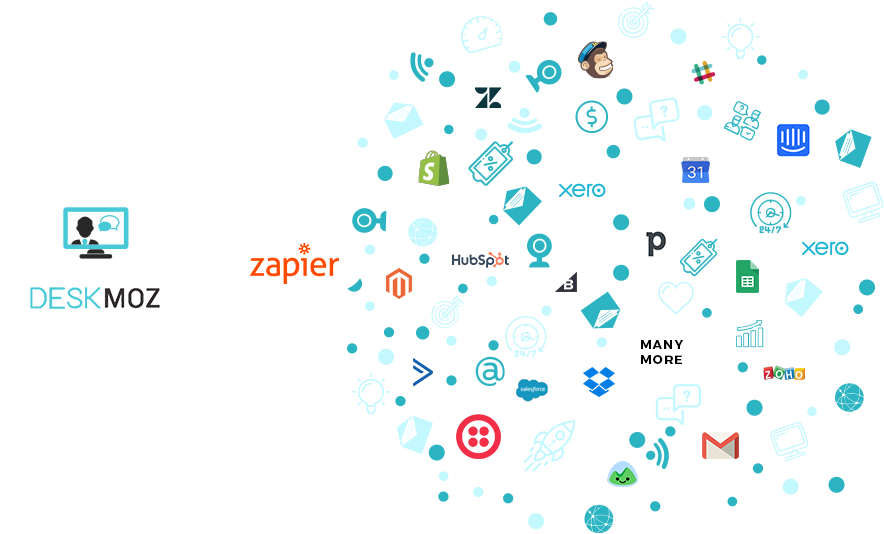
Over Thousand Possibilities with Over Thousand DeskMoz Integrations!
Recommended Integrations
Automate your sales lead generation & chat support with these popular integrations

With the Zapier integration by DeskMoz you can get all your DeskMoz data real-time copied to over 1000 platforms, apps & CRMs.
So, with DeskMoz doing the legwork, you can focus on the tasks that matter the most.
Check the list of all the the apps you could connect your DeskMoz dashboard with here!
Looks Interesting? The Process is A Cake-Walk.
Here is How it Goes-
To explain the steps in a better manner, we are taking the example of how one can automatically create a New Deal in HubSpot CRM for every new Sales Lead generated by DeskMoz.
To get started, first you need to sign into your DeskMoz Dashboard. Here, you will find the option Integrate using Zapier.
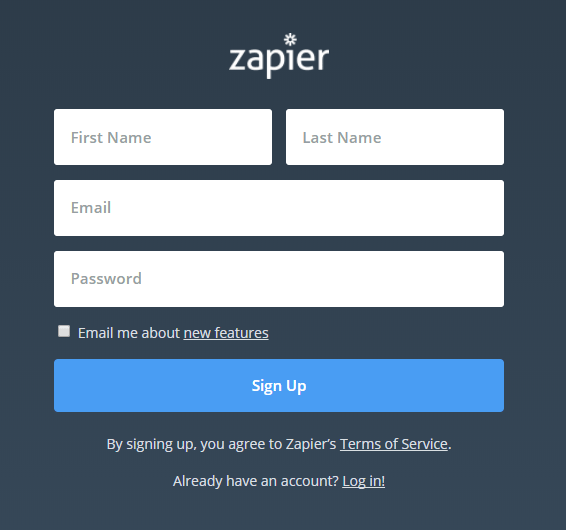
If you already have an account with Zapier, you will need to log-in or you can simply fill-in the details to Sign Up.
Once you sign-in, you will see the following screen. Here you will need to click on ‘MAKE A ZAP!‘.

After clicking on ‘MAKE A ZAP!, you be redirected to the following screen, where you need to search & select DeskMoz as the Trigger App. For convenience, we suggest giving your Zap a name at this point. The Zap can be renamed down the line as well.

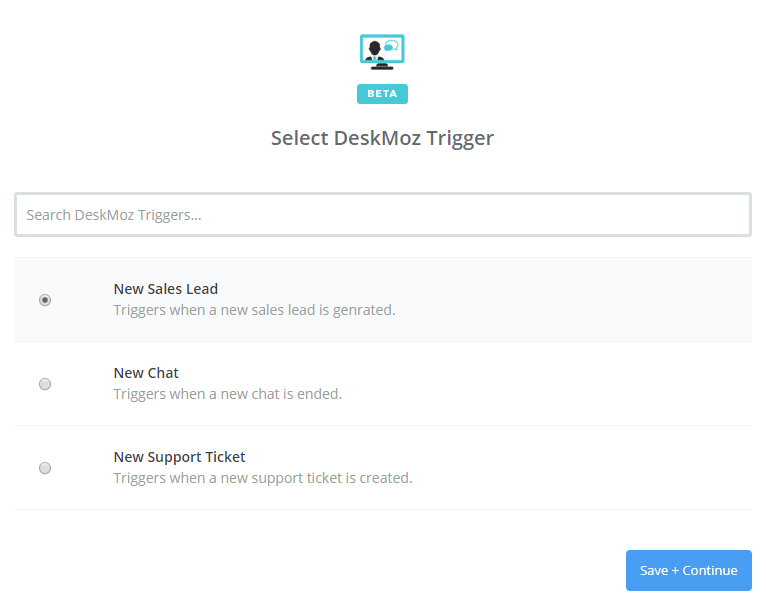
Now, this is a key step. Here, you need to select which data of DeskMoz would you like to automatically feed to the other app or platform.
The Supported Triggers are:
New Chat – Triggers when a new chat is ended.
New Sales Lead – Triggers when a new sales lead is generated.
New Support Ticket – Triggers when a new support ticket is created.
To show an example, we are going to use the New Sales Lead Trigger.
Once you will click ‘Save + Continue‘ you will be redirected to the following screen:
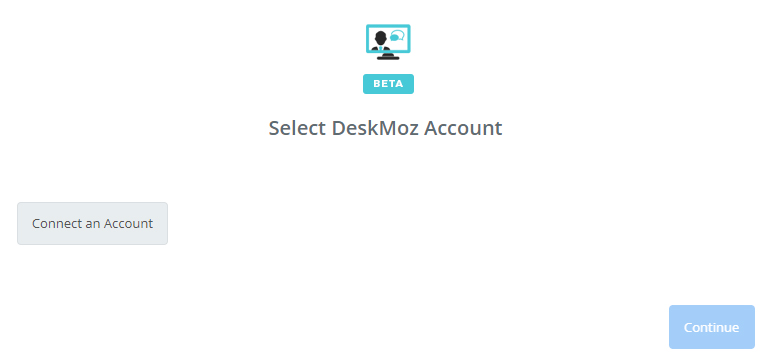
Here, click on ‘Connect an Account’ which will redirect you to the following pop-up screen:
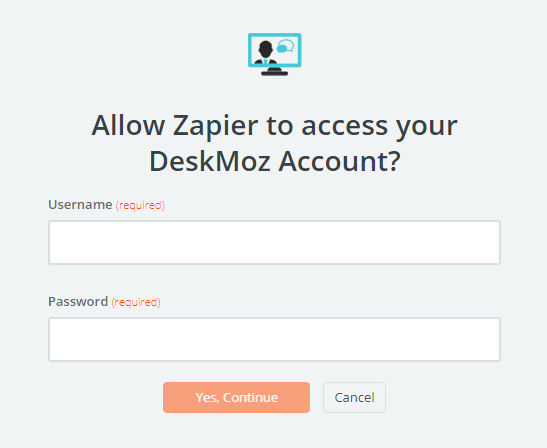
Here, you will need to enter your DeskMoz details.
Doing so, the pop-up screen will disappear & you will be redirected to the following

It is best to ensure that the account has been connected properly by clicking on ‘Test‘.
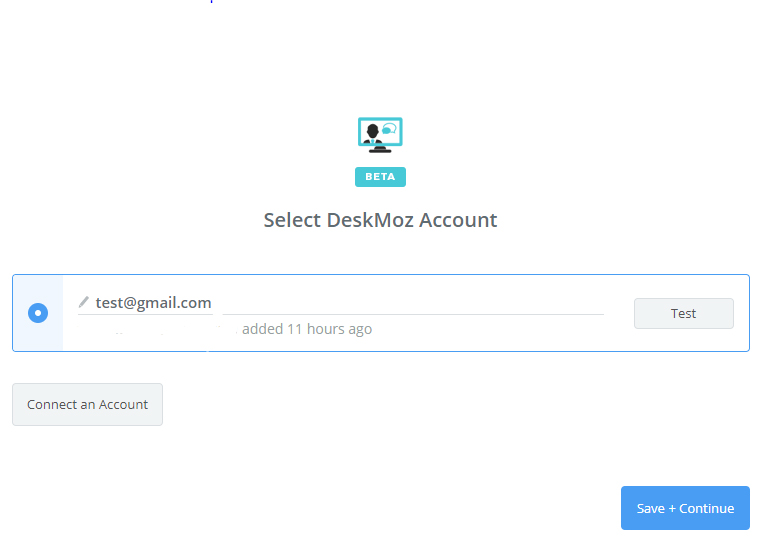
From here, you are all set to get started by clicking on ‘Save+Continue‘.
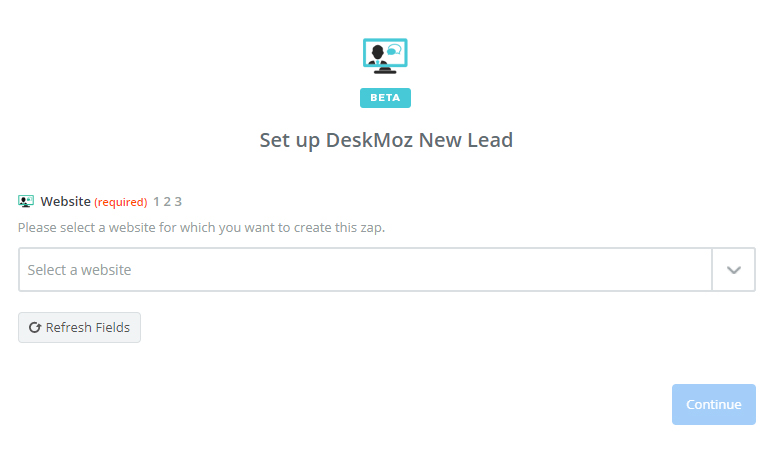
From the drop-down list, select the website for which you are using DeskMoz.
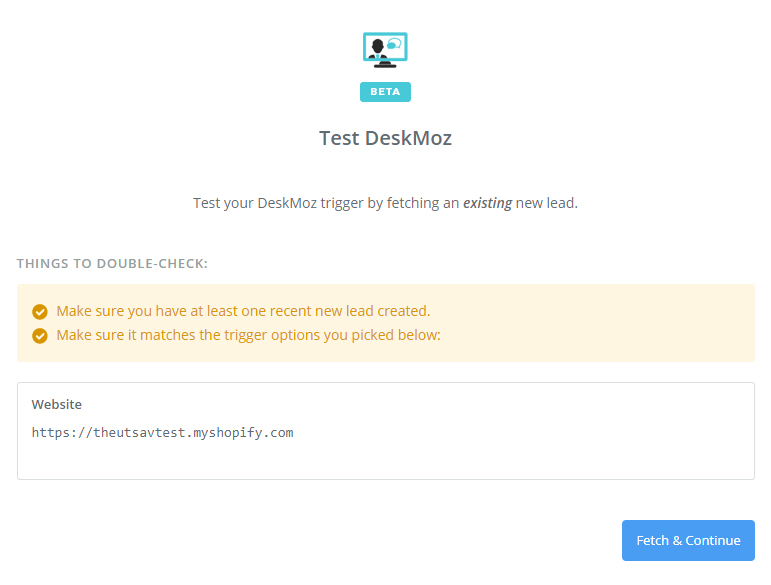
Once selected, click on Fetch & Continue button.
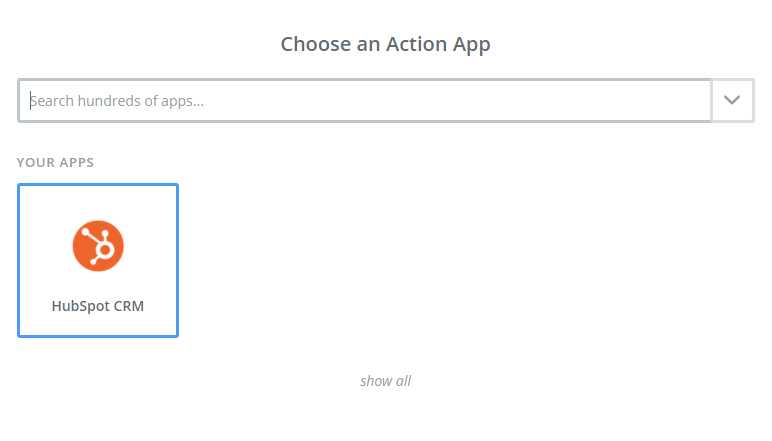
Now, the process moves to the second step. Here, you need to select the Action App i.e the app you want your DeskMoz data be updated to.
For reference, we have taken HubSpot CRM as the Action App.The preceding steps are almost similar, irrespective of the Action App chosen by you.
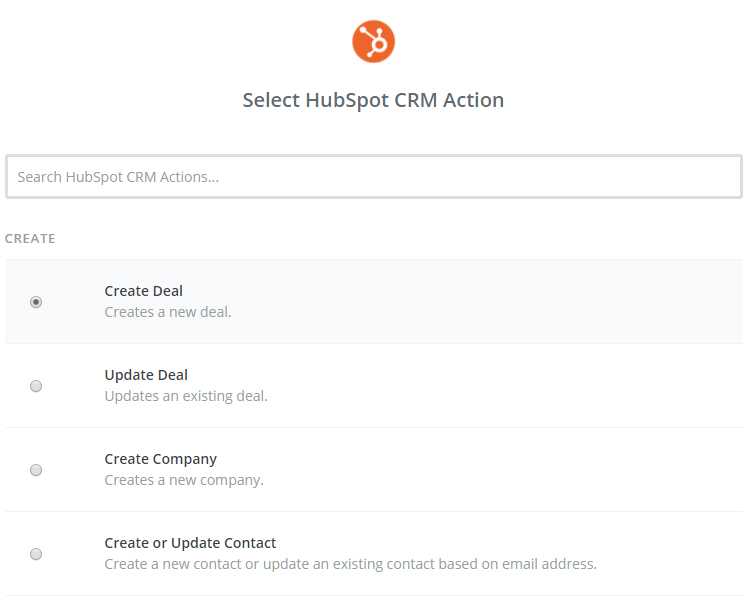
Now, this is a crucial step. Here, you will need to select the action you would like to perform with this integration.
We would like to create a New Deal into HubSpot CRM for every new Sales Lead generated by DeskMoz. So, we clicked on Create Deal, you can choose your desired option from the available Actions.
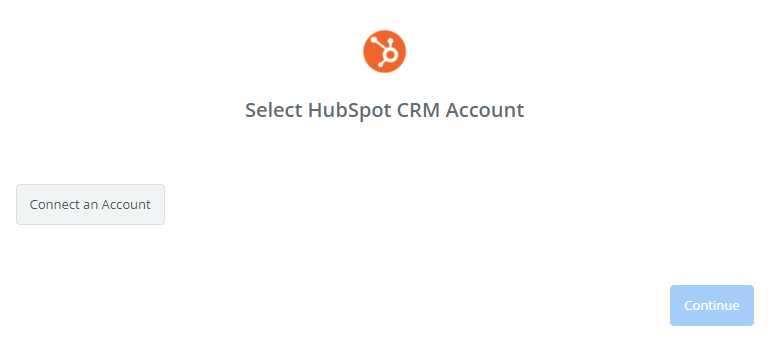
Here, just click on Connect an Account to connect the app you would like to feed your DeskMoz data into.

You will need to provide the login credentials of the Action App i.e the app you would like to feed your DeskMoz data into.
Since we selected the HubSpot CRM as the Action App, it asked us to provide the Hub ID (can be found at the right upper corner of the HubSpot CRM home screen).
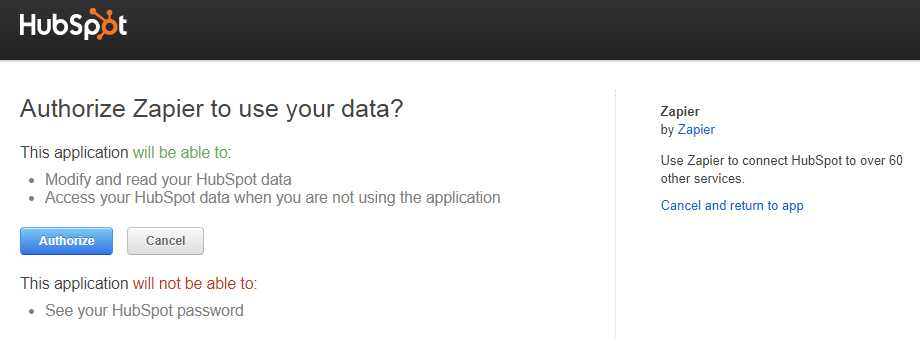
Here, Zapier shows the access which you are providing to the Zapier to facilitate this integration. We recommend you to check it before clicking on ‘Authorize’.
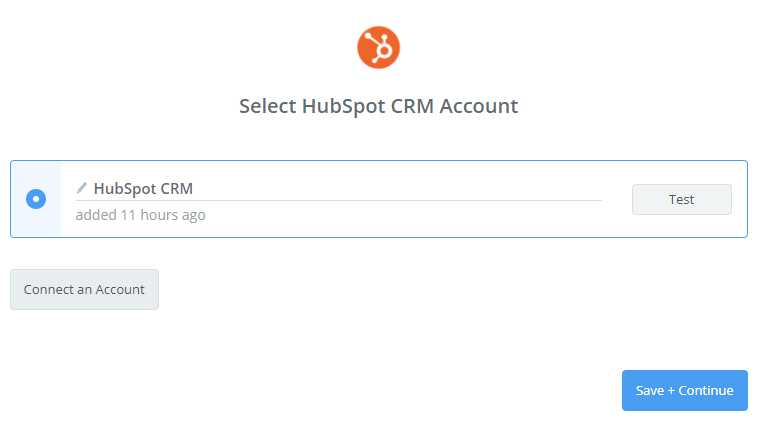
Once authorized, the Action App gets connected & you can go ahead by clicking ‘Save + Continue”.
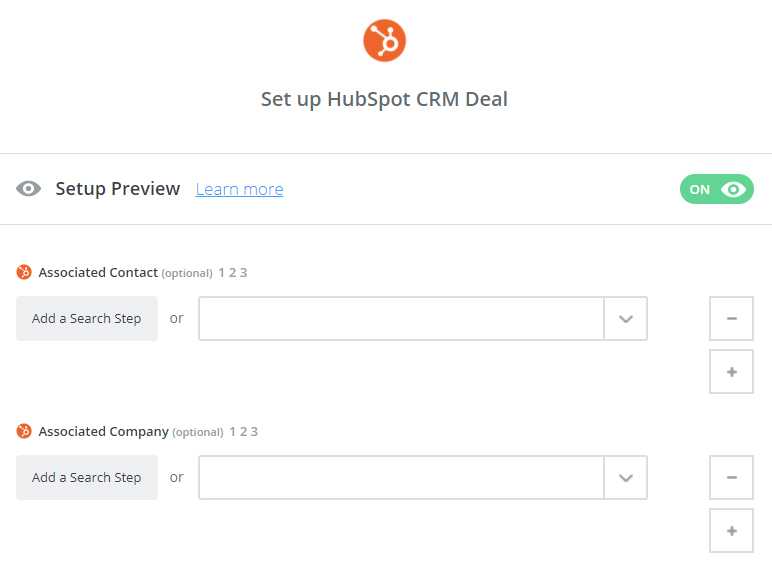
Here, you can select the specific details about where you'd like to see the data generated by DeskMoz.
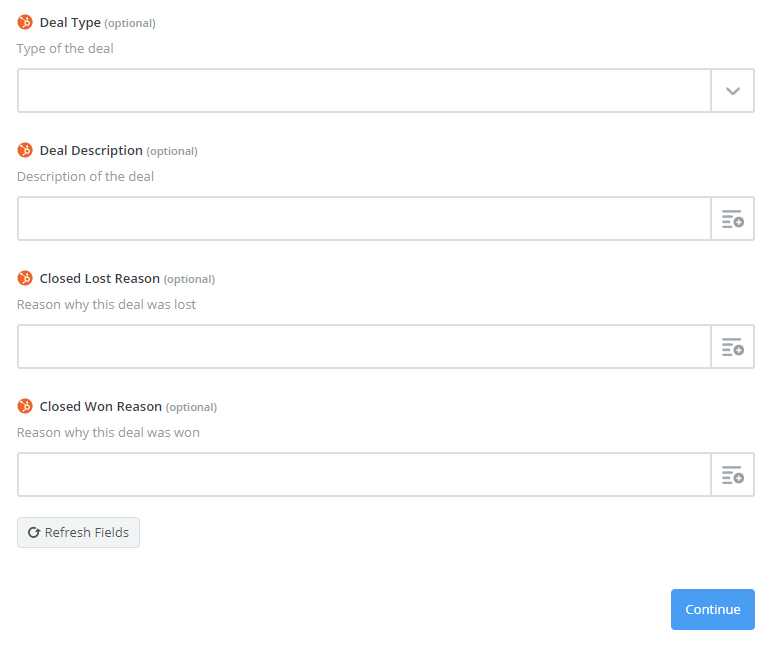
Once you fill-in all the required details (most of the required details are optional), you can move ahead by clicking on ‘Continue’.
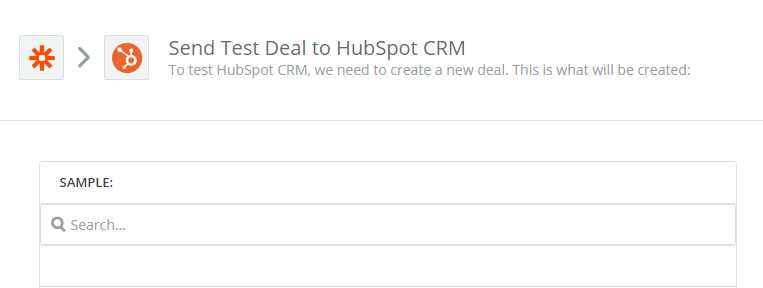

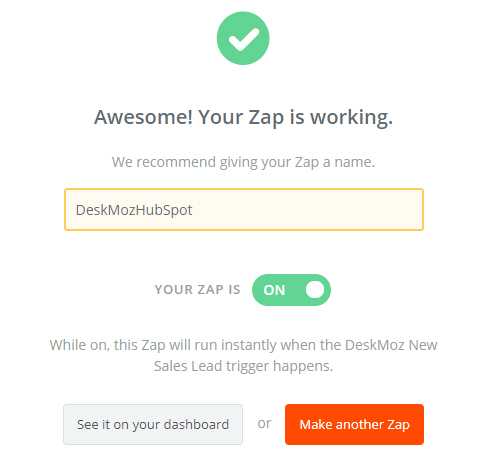
Almost there! Just click on ‘Send Test’.

Click ‘Finish’.
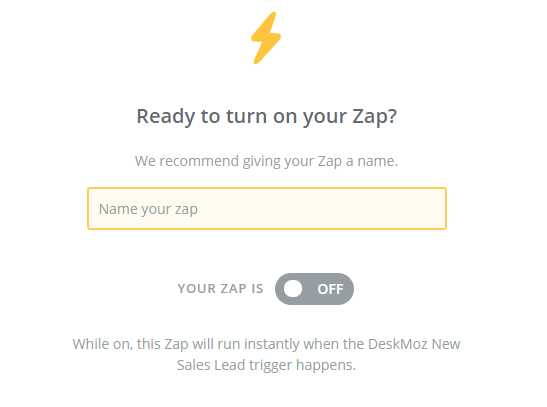
For convenience, give this integration a name.